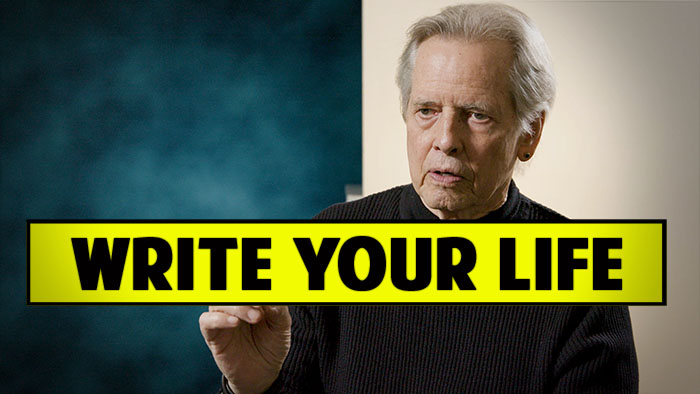

Tyler Durden, Co-founder of Fight Club
Becoming the Zero Budget DIY Filmmaker by MSN Karthik
Precisely an year ago, in the early monsoon months of 2016, I got my calling. A calling from my future self. He asked me, “Do you want to see yourself as the all singing, all dancing crap of the world, when you reach my age?” My answer was instinctively ‘no’. I pondered over my goal of becoming a filmmaker over the next few days and asked myself what stopped me from doing that. The answer was ‘Myself’. I was the only one standing in my way. I realized, giving up on my dreams was a luxury I couldn’t afford. So I began.
“Your future hasn’t been written yet. Your future is whatever you make it. So make it a good one.” — Dr. Brown, Back to the Future
Having decided my path, I had to start taking my baby steps in that direction. In order to do that, I had to figure out two things —
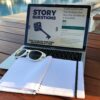
What do I film? And what do I film it with?
My nephew’s naming ceremony was scheduled a week later and it seemed a perfect opportunity for me to hone my skills. Before investing on a good camera and filmmaking gear, I decided to shoot with the equipment I already have, for sometime, while I perfected the art. I dusted off my old point and shoot camera, Nikon P100 and a flimsy photography tripod, Simpex 333, both of which I had bought with my first stipend in college, almost 6 years ago.
I can’t stress this enough: you don’t need a world class equipment to make a world class film.
The next weekend proved to be fruitful, as I filmed the entire event single-handedly. This boosted my confidence at that time, although looking back at the footage today, I feel it could have been much better.
The success of my first shoot raised my spirits sky high and I instantaneously decided to learn everything about filmmaking. And it turns out, internet is the best school. There’s more than enough data available in the public domain, to perfect any skill. During that time, I worked for a startup, which took almost 9 hours of my time everyday. So I took a resolution that I would immerse myself in the ocean of filmmaking, daily after my office hours and on the weekends till I learnt the skills necessary to pull-off a film on my own.
Google Keep to the rescue!
I started listing down the topics I wanted to learn and the resources available on those subjects, across various departments of filmmaking. I maintained this list on Google Keep, which helped me refer back the links whenever needed. I also used to take down notes from various tutorials there. As you can see below, my research ranged all the way from camera lenses to VFX and color grading to drone shots. I really wanted to be a One Man Band.

My knowledge treasure — Google Keep
Following are some of the Youtube channels that immensely helped me in getting started:
-
DSLRGuide, by Simon Cade
-
Film Riot, by Ryan Connolly
-
Fro Knows Photo, by Jared Polin
-
The Frugal Filmmaker, by Scott Eggleston
-
Indy Mogul, by Erik Beck
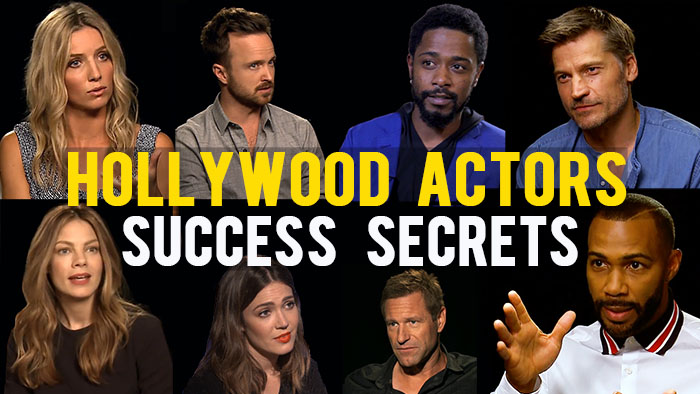
- FilmCourage
Alice in DIY land
Once I got familiar with camera lenses, screenwriting, composition of shots and editing, I wanted to learn about the different kinds of video production equipment. This enthusiasm landed me in shock very soon, as all the equipment needed to get steady and smooth motion shots like Tripods, Camera Sliders, Shoulder Rigs, Steadicams and Jib Cranes cost a bomb for beginners like me.
The first rule of filmmaking is: You invest only after you learn.
The next logical step was to find alternative ways to cheat the system and still get those fluid shots. This introduced me to the DIY Wonderland. I was amazed as to how so many filmmakers on Youtube took frugal approaches to achieve quality in their films at extremely low costs. Over the next weekend, I went through all the tutorials required to make a Shoulder Mount and a Camera Slider, with PVC Pipes, Electrical Conduit Boxes and some screws.
I immediately sketched out some designs on a sheet of paper and took it to a nearby hardware store. The store owner was extremely amused seeing what I was trying to build and patiently helped me figure out all the different types of PVC pipes, joints, adhesives, paints and other tools I would be needing for the project. I then pulled an all nighter and worked for 18 hours straight, which resulted in magic —

All Hail DIY! My first PVC Shoulder Mount and Camera Slider
The above video shows the first ever motion shot, I filmed using my brand new DIY Camera Slider. This success kept me going as I did hundreds of trial shoots over the next week after office hours. Although I sort of aced the fluid motion part of it, my footage was still not up to the mark. Since I was shooting mostly at nights, even with all the lights in my living room turned on, my shots came out pretty dark and any amount of color correction could not fix the issue. Then I realized the importance of lighting in cinematography and began exploring about it online.
Lights come first, Camera and Action follow!
It was then that I got exposed to the terms Key, Fill and Back lights for the first time in my life. I learnt about the Three Point Lighting System and how it can be used to make the shots look more cinematic. Following are some of those topics I research about:
-
Three Light Cinematography
-
Easy light setup to improve your films
-
Using Flags to Control Shadow and Light
-
DIY Cinematic Lighting Setup
But in order to create such a lighting setup at home, I would need to buy Multiboom Light Stands and Diffuser Holders which were of course costly for my pockets. Once again, DIY to the rescue! I googled if I could make them too with PVC and boom! I found the following tutorials:
-
Make a PVC Light Stand for Under $5
-
$10 DIY Light Stand
The hardware store owner was very happy to see his repeat customer. This time, I picked up all the necessary items to make the Light Stands and Diffuser Holders. Then I visited an electrical store to buy 200 Watt Bulbs, Holders, Wires, Aluminium Domes and Clamps. And it was workshop time!

My DIY Lighting experiments
Within 2 days, I was ready with 3 Light Stands and 2 Diffuser Holders, while Parchment Paper became my Light Diffuser. Once the lighting equipment was ready, I began experimenting with them. Those were the times when my living room became a DIY workshop and my bedroom, a zero budget film set.
Roll Camera!
After about a week of experimentation, I was confident enough to buy my first DSLR Camera and ordered a Canon 70D from Amazon, mainly because of the following factors:
-
Budget: Canon 70D is a mid-range DSLR, which gives the results of a high end film camera at low cost, best for budding filmmakers.
-
Autofocus: Its Autofocus system is as smooth as cutting a slice of butter, one of the best in the market.
-
Rotatable Screen: It has a 3-inch LCD display which can be rotated 180° and helps me film myself for my Youtube channels.
I bought the 18–135mm STM Lens, as it provided a greater range than the 18–55 mm, without too much of a loss of quality. Later, I realized this was the best lens for run and gun filmmaking, which I did a lot.
Through more investigation on the 70D, I learnt about the use of flat Picture Profiles, which ensure that the camera captures more details in the highlight and shadow regions of the footage. Having this extra bit of detail gave filmmakers more flexibility while color grading the footage during post-production. Magic Lantern, was one of the famous firmwares for Canon cameras, which allowed us to capture video in flat picture profiles and RAW. But unfortunately, there was no stable release available for Canon 70D and I didn’t want to risk damaging my camera. Hence I installed another firmware called Cinestyle, by Technicolor, which improved my picture quality like crazy.
I figured out that in order to learn more about the different aspects of filmmaking, the best way was to follow a regular cadence. Hence I started a Youtube channel called Raga Riot, with the vision of regularly posting videos about Indian Classical Music, which was a topic close to my heart. The next weekend, I experimented with filming all the musical instruments available at my home, this time with the new camera, my DIY gear and the DIY lighting setup I created.

DIY setup for my first professional shoot
Once the shoot was wrapped, it was time to edit the footage. I had been an Adobe person since my college days and was well versed with Photoshop, Aftereffects and Premier Pro. Earlier, I used them with student discounts, but not being a student anymore made the prices too high to be frugal. Then I stumbled upon one of the best things that happened to me in my life, Davinci Resolve 12.5!
Most people have the opinion that Resolve is just a color grading tool. But that’s not it. It is an end-to-end editing and color correcting powerhouse, where you can manage the entire editing lifecycle of a feature length film, for the unbeatable price of free. Yes you heard it right! Davinci Resolve is absolutely free, if you don’t need 4K support.
Combined with the Cinestyle Picture Profile, Resolve gave me the results of the industry standard film look. Here’s the output of my shoot with the musical instruments, which later became the title sequence for all the future episodes of my Youtube channel:
Check Sound and Power!
At this point, the one most important thing left out was the Audio Recording Gear. As Patrick Drummond rightly said, “The last creative brushstroke that is put onto a film is the soundtrack.” The sound design has the ability to either make or break a film and hence it is extremely essential to have good quality audio recordings, outside of the camera, as most of today’s DSLRs give you crappy audio.
At the same time, I also realized that my Canon 70D ran out of battery in about 50 minutes into video recording. In my future shoots, there might be scenarios where I don’t have access to electricity to charge my batteries, for more than a day. Also, having a large number of batteries was not manageable. After a lot of research, I narrowed down on the following things to buy:
-
Zoom H1 Portable Digital Audio Recorder: Very portable and records up to 30 hours of high quality audio on a 4GB Memory card.
-
Lanparte E6 Portable Battery with LP-E6 Adapter: An external battery pack for Canon 70D which lasts for around 8 hours of continuous video recording, which is more than enough for a day.
B&H Store in the US was selling these products at 50% their Indian cost at that time and luckily one of my colleagues was returning back from the states. So I ordered one Zoom H1 Recorder and two Lanparte E6 Battery packs from B&H. Following the DIY trend, I made a DIY Shock Mount and a DIY Boom Pole to carry the Zoom H1 around.

DIY Shock Mount and Boom Pole for Zoom H1 Audio Recorder
Action!
After the success of the title sequence shoot, it was time for some real action. I decided to shoot the first episode of Raga Riot. What’s more apt than kick-starting an Indian Classical Music channel with the story of it’s evolution? Hence, I made my first video on ‘A Brief History of Carnatic Music’.

Behind the scenes pictures of my bedroom set.
Here’s the final output of the shoot
Later on, I filmed a cover video of Coldplay’s The Scientist, in my bedroom
This is how I successfully graduated from being a rookie to a Zero Budget DIY Filmmaker. Now having launched my own Youtube channel for a regular cadence, I wanted to learn more about how real films were shot. My passion for travel and filmmaking logically pointed me to pursue the filming of Travel Documentaries next.
Call to Action
Thank you for reading this article. If you’ve read this far, please consider sharing it.
If you are a filmmaker, hope this article has inspired you to further your passion.
I will be posting blog articles on each filmmaking milestone I reach. If you have a question about filmmaking or have something interesting to collaborate on, contact me at karthiksn92[at]gmail[dot]com.
Adwhyta: My Film Production Channel
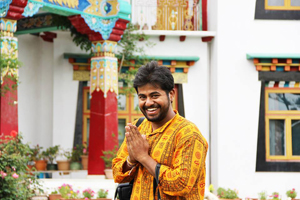
BIO: Hello! I am MSN Karthik, an Independent Filmmaker and a Product Guy from India, without any formal education in the Film. For many, films are a hobby. For some, they are a passion. But for me, films are life. Films are what shaped me since my childhood. I watched Rob Williams in awe, as he stood up on his desk to inspire his students to seize the day, in Dead Poets Society. Film seemed a powerful medium to communicate ideas and I wanted to become a filmmaker when I grew up. But in India joining such a profession was not encouraged and I had to take up an IT job to please others. But the filmmaking bug in me never died. At 24, I started honing my skills by sheer desk research. I built my own DIY filming & lighting gear and made my 1st documentary film early this year, without any professional guidance but with unparalleled conviction to deliver my story.
I realized storytelling is what defines me and is what I would want to do forever. So, I started traveling across India in search of untold stories. I covered Bodh Gaya in the East to Rajasthan in the West and Himalayas in the North. Such a vast country seemed very small in front of my quest to tell an engaging story. I did this all by myself, without any crew or mentorship. In this journey of becoming a one man band filmmaker, I started documenting the processes I followed to help budding filmmakers achieve their vision.
Reach out to the filmmaker at:
https://www.facebook.com/M.S.
https://twitter.com/MSNKarthik
https://www.linkedin.com/in/
Subscribe to Adwhyta, the Film Production House at:
https://www.youtube.com/
https://www.facebook.com/
https://www.twitter.com/adwhyta
Subscribe to RagaRiot, the Music Channel at:
https://www.youtube.com/
https://www.facebook.com/
https://www.twitter.com/
Advertisement